Importing Demographic Data
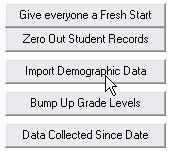 In this example we are going to update the class lists. To begin, go to Utilities and then End of Semester. Here you can click Import Demographic Data as shown on the right.
 HLS uses a Wizard to walk you through the steps.
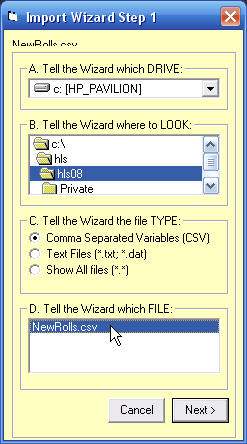
Import Wizard Step 1
- Select the drive where your import file is saved.
- Select the folder or directory that contains the file
- Select the file type as shown on the right.
- Highlight the name of your file.
Then to complete Step 1, click the button.
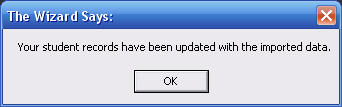
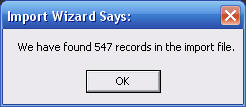 The Wizard will tell you how many records it has found in your file. Make sure this number makes sense to you.
Import Wizard Step 2
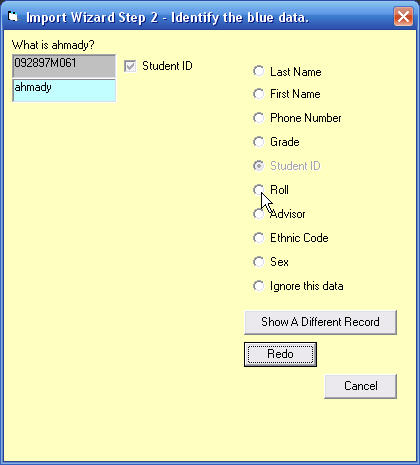
The Wizard will walk you through identifying your data. Look at the item in blue and select the type of data it is from the list on the right.
When you are satisfied that you have correctly identified all of your data, click the button.
Import Wizard Step 3
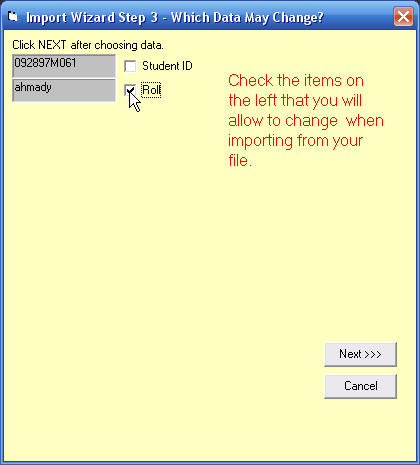
In this step you will tell the Wizard which data it can change. In our example, we are not changing the student id number only the roll room teacher. Only one of our two boxes is checked.
Click the button.
![]() Now the wizard wants to know if you want to clear out the old class lists. In our example, the wizard would go through all of your records and change the roll room code to: none.
Now the wizard wants to know if you want to clear out the old class lists. In our example, the wizard would go through all of your records and change the roll room code to: none.
We recommend that you do this. When you are finished you can check the group for none and find any students that were not included in the new import file.
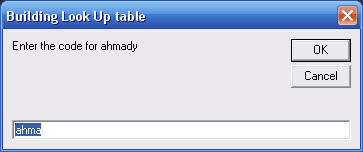
Building a Look Up Table
To make importing data as easy as possible, the wizard is going to now build a look up table of your teacher names and their four letter staff codes.

The first time you import data it means that the wizard will stop and ask for your input each time it sees a new teacher's name. The good news, however, is that it will keep this table so you don't have to rebuild it the next time you want to import data.
When the wizard finds a staff name that is not on the table it will guess what the code might be and let you respond.
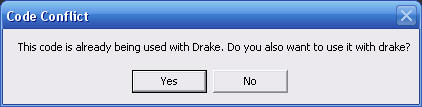
In the following window, we see that the wizard has found a second spelling for the same teacher's name. One was capitalized and one not. It is asking if it is OK to use the same staff code for both spellings. We would say yes.
Importing the Data
Once the look up table has been created the wizard will start importing the data. It is always better to use student ID numbers rather than names when importing. The process will go very quickly. When you use names you will be asked to check the spelling and resolve duplicate names through out the process.