Options #1 in the Site Editor
 A multitude of options and settings that you can use to configure and tune your Honor Level System program to meet the needs of your school are spread over four Options Windows in the Site Editor. To access the first window,
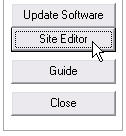
go to Utilities and open the editor as shown here on the right.
A multitude of options and settings that you can use to configure and tune your Honor Level System program to meet the needs of your school are spread over four Options Windows in the Site Editor. To access the first window,
go to Utilities and open the editor as shown here on the right.
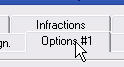 Then click the Options #1 tab at the top of the window.
The options window will appear. It looks like this:

We will go over all of these features frame by frame below.
 Remember, you can always check the Help Box and then move your mouse pointer over objects in the window to learn more about what you see on the screen.
Defining your Honor Levels
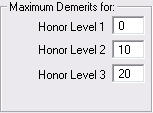 The numbers you put in these boxes will be the highest number of demerits a student can currently have to remain on this Honor Level.
Traditionally we have set aside Honor Level One for students who have not had ANY infractions in the last two weeks. Some schools have asked to allow students with 1, 2 or 3 demerits to stay on HL1. If you want to do this change the number here.
You do not see a place to enter a number for Honor Level 4. It is not needed. As soon as a student earns more demerits than the limit for HL3, he will be on four.
A few schools have requested that they have only three Honor Levels. To do this, set the maximum number of demerits for HL3 very high, for example: 99. If you do this it is extremely unlikely that any student will receive enough demerits to exceed this mark.
Changing the Titles of your Honor Levels
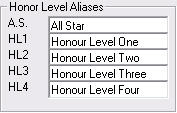 If you want to change the terms used for your Honor Levels you can do it here.
In the example on the right, we see how a Canadian school might want to change the spelling of the word Honour so that it appears as they would expect it in their reports.
Some schools may want to use completely different terms for their levels. Care should be taken, however, in that your new terms are not so long that they disrupt the printing of columns in your reports. Be sure to try printing a few items after you have made changes here to test that the end result looks right.
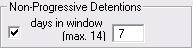
Non Progressive Infraction Settings
 Click here for an explanation of Non-Progressive Infractions.
The default settings for HLS will have this option turned on. Uncheck the box here if you want to disable it.
Usually Non-Progressive Infractions use a shorter window than regular infractions. You can change the number here. In some cases you may want to use a number smaller than 7, such as 3 but give some thought to using a larger number. For example, if you set the number as 10, depending on when during the week an infraction occurs, the number of school days that it is held against the student can vary greatly because of weekends.
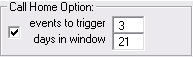
Call Home Settings
 Click here for an explanation of the Call Home option.
The default settings for HLS will have this option turned on. Uncheck the box here if you want to disable it.
This option watches for reoccuring events between the same teacher and student.
Events to Trigger:
- This is the number of events submitted by any teacher that the computer is counting before it prints the request to contact home.
Days in Window:
- This is the number of days you want the computer to look back while counting events. This number is independent of the student's Roll-Over Window and can be any value you choose. We recommend the default value of 21 when you start using HLS.
As you use the program you can adjust these two numbers if you find that your are getting too many or not enough requests to contact home.
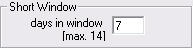
Changing the Days in your Short Window
 Click here for an explanation of the Short Window.
You may want some (or all) students in your school to uses a shorter window than our regular 14 days. This may be because of the lower grade level, or because you are trying to accomdate special needs students.
You can set the number of days here. In some cases you may want to use a number smaller than 7, such as 3 but give some thought to using a larger number. For example, if you set the number as 10, depending on when during the week an infraction occurs, the number of school days that it is held against the student can vary greatly because of weekends.
The Miscellaneous Settings
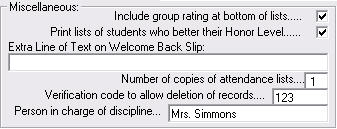
Include Group Rating:

- This option provides a score based on the Honor Levels of all the members of a
Bettered their Honor Level:

- Your program comes set up to print each day lists of students who have improved their Honor Level. Click here to learn more. Uncheck this box if you do not want to use this option.
Extra Text on Welcome Back slip:

- If you have the above featured enabled, you can also enter an additional line of text that you want to appear on your Wecome Back slips.
Copies of Attendance List:

- Here is where you set the number of attendance lists you need. It will appear as the default in the Print Task Manager.
Verification Code:

- This is where you can set your own verification code. Your software will ask for this code before it executes tasks that would be difficult to undo.
Person In Charge:

- You can place the name of the person who is in charge of your school disicpline here. Currently this name only appears on the second copy of the attendance lists if you have set up your software to print more than one set as described above.
Some schools elect to put a generic title here instead of a name, for example: Principal
Print Task Economy Settings
 Here you are given the choice between saving paper and saving time.
If you select Time the Print Task Manager will eject a page and start printing on a new sheet of paper each time it starts a batch of slips for a different teacher. This makes cutting and distributing the slips quicker and easier.
If you select Paper printing will continue on each sheet even when the slips switch to a new teacher's batch. This saves paper, but requires more effort to separate slips for the different classrooms.
Saving Your Changes
 When you close this window you will be given the choice to save your changes.
Edit Options #2
